

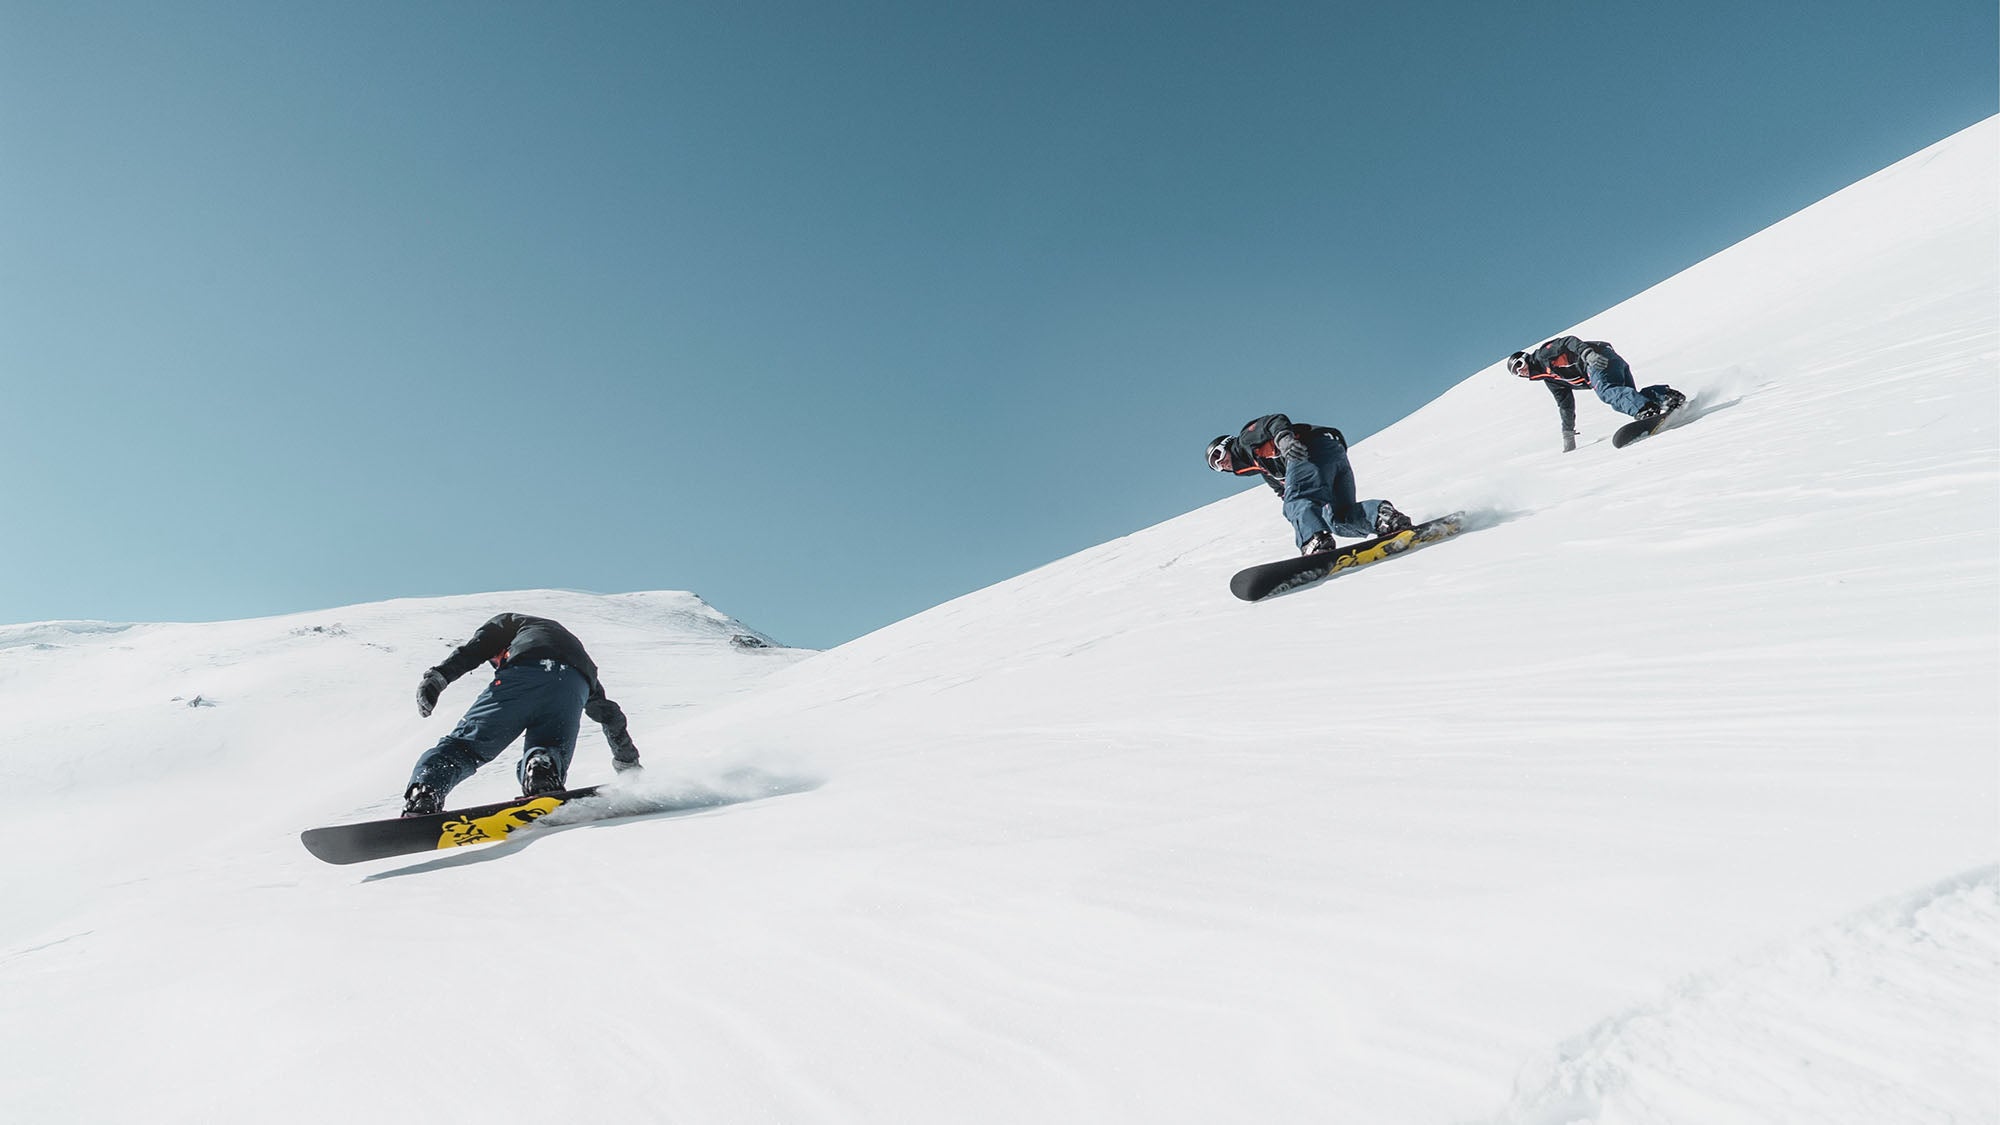
Snowboarding: Getting Started
Snowboarding is FUN. The following information will help you have MORE FUN snowboarding. Here are some tips from Eastern Boarder to help you get on your way.
Now, with the wonder of the internet you can get all of the information you need to start snowboarding and get off on the right foot. We know that sometimes the magazines and videos don't really show you where to begin, so we will. First start with the basics, what to wear, what to ride, where to go, and how to pull it all off and not break the bank.
We've compiled everything you need to know about snowboarding here in our resource guide. Scroll down and read it all or Hit the links on the above to checkout specific topics. Check back very soon for more product reviews, resort guides, events lists and more.
The first time ever
Its a good idea to start off with a buddy. Choose a friend that you want to spend the day with, a friend that can take the same amount of physical abuse as you can. If you are lucky enough to have patient friends, go with them, but expect to spend some time on your own. Most mountains have a Lift Ticket / Beginner Lesson Deal, check the mountains websites for promotions and current deals. A lesson will have you making turns by the end of your first day. Just a small insiders tip: If you are just starting or are new to the game, Its not called "boarding" or "boardin'" and you are not going to board this weekend . People that snowboard say "going snowboarding", or "riding."
The most important thing is your clothing, wearing the correct gear will keep you warm and happy. Dress in layers, the first layer (closest to your body) will be thermal underwear top & bottom, 2nd fleece tops or a lightweight sweater. And finally the outer layer consisting of a waterproof jacket, and waterproof pants. You will also need a nice pair of tall poly-pro socks to keep your toes warm. Poly Pro thermals are important because they keep your body dry by wicking away sweat, this in turn will keep YOU warm. The 2nd layer, will help keep body heat in close to your body. The more layers, the warmer you will be. Your Jacket will keep all the heat in and the cold out, so find one that is windproof and waterproof. Same deal with your pants. Stay away from cotton!! No sweatpants or windbreakers, they only get wet and cold and you get bummed out.
Get some gloves or mittens that are waterproof and really warm. The stronger the better, you will probably blow through a few pair your first year, don't worry about getting the most expensive ones, just make sure they are waterproof and warm. It is a good habit to bring at least one back-up pair everytime you go riding (don't let wet gear ruin your day).
|
the official checklist |
|
|
|
|
If you forget any of these things |
If you forget any of these things you will be in rough shape..... |
Other good things |
Necessary things to bring in the Backcountry..... (If your reading this, don't go unless you bring a VERY experienced friend) |
Buying a new snowboard
BUYING A NEW BOARD
Buying a new snowboard is awesome, nothing else feels like a fresh new board.
The first thing you should know is, snowboards are measured using the metric system, length are in centimeters and other specs in millimeters.
A new snowboard for an adult should start from $270 (anything less wont last). As price goes up, the board gets better. The construction gets stronger, lighter and it will go faster (this doesn't mean that the most expensive board is the best board).
Every sales man has a pitch about what board is better and why.... here's mine. I'm a believer that snowboards are designed for weight before they are designed for height. When they design a board there are tons of test done on each model before they release it. The riders weight will determine if they will be able to flex the board enough to make it turn, if you are too light the edge won't put enough pressure on the snow and allow for a smooth turn. If you are too heavy for the board the board will flex out and lose its contact will the snow and you will skid out and be bummed. I think the chin measurement myth is just an easy way of selling a board. I'm 6' and have owned boards from 153 to 166cm all of them being the correct board for the conditions. On the back of a new board there is usually a spec sheet that has each size model and what weight the board is designed. Check it. Also check the Waist width of the board, if your feet are too small you wont be able to turn the board. If they are too big you will catch them on the snow and wreck.
Generally Park boards will be wider, softer and have less sidecut, while Freeride boards will be stiffer, have deeper sidecut and offer more control while turning. A smaller board will be easier to spin and do tricks with and a longer board will float in powder better. So buy a board based on the conditions you plan on riding most often.
[From The Burton LTR Site]
Want to feel comfortable walking into your local shop and picking out the perfect board? Arm yourself with knowledge. Read on, and you'll know exactly how even the most experienced riders choose their sticks.
Board Width
Just like your average supermodel, snowboarders are always concerned about their waist width. Only in this case, waist width (WW) refers to the skinniest part of the board, right between the bindings. Pick a board with the narrowest WW you can get away with for your boot size, as a board that is too wide is harder to get on edge and initiate turns-resulting in a slow, sluggish ride-and a board that is too narrow creates toe and heel drag, which slows you down and makes it difficult to carve turns.
Board Length
As a general rule, standing on end, your board should come somewhere between your chest and your eyes (Fig. 1), although weight is the most accurate way to determine board size. But board length is more a matter of personal preference, so take a look at how you want your board to perform. If you plan to spend a lot of time in the park and pipe, a shorter board will allow for increased maneuverability and a lower swing weight resulting in faster, easier spins. If riding the entire mountain sounds like your thing, a longer board will provide the stability you'll need to rip at high speeds over varied terrain. We've also provided suggested weight ranges for each board that give you a general idea of what size board you could ride.
Board Feel
Mix up a little core profile, flex and torsion, and you get the overall feel of the board.
Core Profile: The core profile is basically the side view of the snowboard that determines where the board's core is thicker and thinner. Each board has a different core shape, or profile, that helps determine its flex and ride characteristics.
Flex: The core profile in combination with the fiberglass laminate creates the overall flex of the board. Flex isn't very important. Just kidding. Flex affects super-important things like turning, edge hold and ollies.
Torsion: This refers to how a board twists along the center axis. A board with a softer torsion will be more forgiving for landing tricks and buttering, but a stiffer torsion will provide a more responsive ride and help your edge hold through a fast turn.
Board Choice Recap
1) Your board should be as narrow as you can get away with for your boot size.
2) Standing on end, your board should come somewhere between your chest and your eyes, depending on your riding style.
3) You should flex the board, eyeball the core profile and keep in mind how the stiffness affects the overall ride.
4) Ok, NOW you can look at the graphics, because we spend a lot of time working on those, too.
Board categories
In another attempt to aid in the process of purchasing a snowboard, here are the breakdowns and definitions of flex and snowboard categories...
Categories: In years past, the breakdown of board categories was pretty easy, you either had an all mountain directional, a twin freestyle, or an alpine with a few hybrids mixed in. Now there are many more sub-categories to take into account. One term that has largely disappeared is the "All Mountain" snowboard. I personally don't like this term, all snowboards are "All Mountain" no matter what their main design is for. To explain a little bit further, here are the basic details to the major categories of boards currently.
Park: This type of board is very popular right now. With the increase in popularity of rail riding and park riding overall, this has caused most, if not all companies, to bump up the number of park specific boards they manufacture. The classic definition of a "Park" snowboard is twin (nose and tail are the exactly the same) in shape and flex (evenly distributed flex from the center of the board), and generally softer in longitudinal flex. That is the broad spectrum of the "Park" category, but there are a couple other sub-categories that I will now get into.
Jib boards: The "Jib" board is generally very basic in design, rarely having anything more than just a wood core and biaxial fiberglass. This equates to a very soft flexing snowboard which is ideal for pressing on rails and boxes. There are many boards in this category including the K2 WWW, Ride kink and the Rome Artifact. Most have a blunted off nose and tail, to allow the effective edge to be much longer than it normally would be with a board of their respective size. The advantage to this method is that you are able to size down a considerable amount, as much as 5 cm. If you were looking for a "Street" board, this would be the category to look under. These boards can be taken off jumps, although I wouldn't necessarily go hit the 60 footer at Loon with a 52 WWweapon, go for the 30 footer instead. (price range: $300-$400)
All Park: I'm not really sure if this category is definitive, but the way I look at it is that these are boards with a little more to them than jib boards, yet have a little more flex than the more jump specific boards. The general make up of these boards is a composite wood core possibly with some carbon fiber inserts, triaxial or reinforced biaxial fiberglass, and a sintered base. There are many variations in technologies from company to company, but the overall objective for these boards are to make them soft enough to press out on rails, yet stable enough to take on some harder jump landings. This is a very big category for many companies, such staple boards as the Burton Custom (ICS shown), Lib Tech TRS, and Rome Agent all fall under this category. (price range: $400-$600)
Jump/Pipe Boards: This is a category that you're not going to see on the cheat sheet on the back of a board, and is not all that different than the "All Park" board. The main difference will be in the flex, these boards are a little stiffer both torsionally and longitudinally. This aids in giving you a stable platform to land on when hitting the big jump line. Pipe specific boards do not officially exist, but most of the big name guys use boards that would fall into this category. The Ride DH 2, Forum Pat Moore, and Burton Un-INC are all great examples of this type of board. (price range: $450-$700)
Freeride: This is the term that has replaced "All Mountain," a freeride board is generally a directional shape (nose is longer than the tail), this allows for ease into and out of turns. The differences in "Freeride" boards come mostly down to stiffness and base material. The softer the flex, the cheaper the board is going to be, also the easier it will be to learn on. The more expensive boards in this category generally have the most technically advanced features, for example the Burton Vapor, which has a completely aluminum core, stainless steel edges, the highest grade base available, and every other possible belle and/or whistle. If you are the type of person who wants to go fast, a higher end freeride board is right up your alley. (price range: $250-$1000)
Powder: Lib Tech has a board that explains this perfectly... It's called the Mullet, but in this case it's long in front and short in back. All "Powder" specific boards have a very set back stance to allow you to float as much and as easily as possible in the powder. Some even have what's known as a swallow tail, which is a tail that splits into two, this allows you to have the tail sink into the snow allowing the nose to float freely above the powder. A good alternative to having a purely powder specific board is to set back a "Freeride" board more than you usually would on those big dump days. "Powder" boards are amazing inside their own element, however, when taken to groomers or anything other than powder these boards become excessive. The extremely large nose as well as some unusual shapes tend to make these boards terrible on hardpack. If you get the chance to ride something like the Travis Rice Banana Hammock in 2 feet of Vermont's finest, do not pass up the opportunity. (price range: $500-$1200)
What is flex?
Perhaps the most important characteristic of a snowboard, the flex is what determines the type of riding the board is designed for. There are 2 main types of flex to concern yourself with: torsional; which is the horizontal flex of the board (edge to edge) and longitudinal; the vertical flex of the board (tip to tail). So now that you know the differences in terms we can start to explain what to look for in each category. The flex that you feel the most is going to be the longitudinal flex, this is the factor that generally determines the "flex rating" of the board, although torsional flex has a great deal of impact upon "turnability" and edge stability at high speeds. To make this even easier, I am going to break down the different flexes in the way every company does... on a scale of 1 to 10!!! OMG!!!
1-3 rating: Does not exist. If you find something this low it's too soft. Probably not a full wood core.
3-5 rating: This is the category that the majority of all boards under $400 fall into. This flex is ideal for beginner to intermediate riders, as well as low to mid level park boards. Most Jib boards fall into this rating.
5-8 rating: This range of flex encompasses the "All Park" and Jump board categories, as well as the mid to upper mid range freeride boards.
8-10 rating: If a board has this high of a rating you can be sure of two things, it's expensive and very fast. The majority of all high end freeride boards can be included in this group.
Hopefully this plethora of knowledge can further assist you in the purchase of a new snowboard. Thanks for reading. -EB Natick
Buying new bindings
If you are thinking about buying your first setup ever...
Bindings are almost if not, just as important as your snowboard deck. Choosing the right bindings make all the difference. Bindings come in different heights and different flexes, generally taller bindings will be stiffer. Softer bindings will be more forgiving but will sacrifice edge control, while stiffer bindings will provide the most amount control but will leave you less room for mistakes.
First off, bindings are made to fit your boots, and each company builds their bindings to fit their boots. You don't have to buy the same brand for both, but keep in mind they are built around each other. Each company is different so find your shoe size and check the binding box to find your correct binding size. Some Brands will do a S, M, L others will do a S/M, M/L.
Cost
The cost of quality new binding will range anywhere around $99-$250, there are models over $300. As prices get higher the overall weight drops and comfort and performance increases. It's best to find a happy medium that your budget can handle. If you are in the $99 dollar range try to push it to $130, the binding will last a little longer and be a lot more comfortable. Once around $150 you can expect to find a good binding made from composites and will have a few flashy colors to choose from. This range of bindings will have the most selection and offer the most styles. The $200+ range will have better materials and be ultimately the most comfortable. Straps will be sewn or made of soft leather, baseplates will have more cushion and highbacks will be more form fitting. You can expect bindings to last 80-100 riding days, straps will wear out and screws should be replaced each year.
Highbacks
The tallest part of the binding is called the highback, highbacks come in different heights and flexes. A tall highback will power through a heelside carve, putting as much force as possible into the snow. But if it is too tall it will hurt your calves. A lower It is best to stick with a normal sized highback, unless you've been snowboarding a bit, stick to the regular size. Highbacks flex too a stiff highback will provide control and a softer highback will offer comfort while sacrifici ng control.
Baseplate
The baseplate (footbed) is what matters most when buildi ng a binding, but I think is overlooked when purchasing bindings. This is where the binding comes in contact with the board, all the factors come into play here, strength, flex, contact, durability and adjustments (strap/highback/discs).
A beginner should start off with a regular priced, solid binding that fits well and feels comfortable. Avoid Pressure points and bindings that are hard to get in and out of. So take a few off the shelf, mess around whith the buckles and ask as many questions as you like.
5 types of binding entry systems
Over the past four decades people have tried to improve the way you attach your snowboard onto your feet. First there were rubber pads that you stood on. Then someone put long straps (like bike tubes) down t he length of the deck, then made separate straps for each foot, kinda like waterskis. Eventually this design was improved on and highbacks were added and straps became adjustable and more comfortable. But since the mid-eighties not much has changed. Some companies tried new ideas but they are all based on the original design.
Strap-In - Traditional or Strap-In bindings are the most common way of attaching your feet to your snowboard. They usually attach by placing your foot into the binding and then wrapping two straps around the top of your foot. They are adjusted by tightening ratchets on each strap. The highbacks fold down for trans port reasons, but stays in the upright position when on in use.
Baseless - Baseless bindings were popular in the early 90s but disappeared because of incompatibility between manufacturers. These bindings let the boot come in direct contact with the board by removing the baseplate. Now they are much improved and are back again in 2007. Burton Released the EST Baseless Binding and it feels amazing. These bindings can be run with or without the foam pad that fits under your foot. They are light, and supportive, and offer millions of stance options. But like before in the 90s they only fit on one type of board, a burton with infinite channel technology.
Fold-Down - A few companies have bindings based on fold-down technology, the highback folds down away from the binding. the rider inserts their foot from behind and locks the highback back into place. Once locked into place they feel and perform just like traditional bindings. The benefits of this system is a rider can get into their setup and get running quicker. It is also great for young kids and rental programs.
Step In - In the 90s almost every company had some form of step in binding. This where the boot had a cleat that locked into the binding, these were based on clipless bicycle pedals. Step In bindings were crea ted to make snowboards easier to get in and out of. On the contrary made it more difficult to get in and out of your setup. Many rental programs adapted these setups and heavy marketing made people think these were the future of our sport. Now in 2008, it is next to impossible to find a step in snowboard binding, there is a reason for this.
Hard Plate - Hard plate bindings are for the racer and performance driven snowboarder. Hardplates were very minimalist and rigid, they allowed for a ski boot to be ridden on a snowboard. Thus offering the rider superior edge control. Hard plates are severely limited, They are made for running fast and hard down a mountain, they are like the F1 racecar of the binding world.
Thanks to technology we now have the perfect bindings. You no longer have to sacrifice comfort for performance.
Buying new boots
[From The Burton LTR Site]
How To Choose Your Boots
Since warm, comfortable feet are essential to having a good time on the hill (as well as skipping circles around those skiers in the resort parking lot), many riders consider boots to be the most important choice when building their setup. As a beginner, your boots will be easier to pick out than your board, because you already know what size to get. But don't skimp here! Read on to find out how to keep your dogs from biting.
Shells
The outer layer of the boot is typically referred to as the shell. Shells are composed of high-tech materials to keep the elements out and lacing systems to keep your feet in. Check for a short overall dimension. Clunky boots or pointy toes might get you style points somewhere else, but on the hill, they just hold you back.
Liners
A boot is only as good as its liner. You'll want a comfortable, secure fit with no pressure points. The best way to find out which liner is for you is to get your foot into a boot and test it out. Many liners, such as our Imprint EVA liners, are heat-moldable so you can customize the liner to the shape and contour of your foot. Comfort and warmth are never a question. Stitched, or lace-up style liners (we call ours the Matrix liner), can be cinched as tightly or loosely as you please to accommodate a range of foot and calf shapes. We offer both Imprint EVA and Matrix liners to satisfy all flavors of feet. "Flavors of feet" sounds pretty gross. Let's move on.
Fit
Liners are built around a human foot-form, or last, and the shells are built around the liners. Make sure the boots you choose have 1:1 lasting, meaning for every half and full size boot, there is a matching, perfectly engineered, half and full size liner to go with it. (Hint: ALL Burton boots feature 1:1 lasting. How's that for subtlety?) And of course, our women's boots are created around a women's-specific last, because women shouldn't have to make do with some dude's stuff (unless, of course, she wants to). With the boot fully laced and tight, your toes should just brush against the front of the liner. Wiggle room is good as it gives your toes room for circulation and warmth. Growing room is bad as it creates heel lift, toe bang and reduced response. When you try on boots in the shop, ask to strap into some bindings. Make sure the straps don't create any painful pressure points and that your heel doesn't lift when you bend your knees or stand on your toes.
Boot Choice Recap
1) Use discrimination when shopping for boots. Happy feet are attached to happy snowboarders.
2) Pull out the liner and check quality.
3) 1:1 Lasting is good. It means that every whole and half size liner has a matching whole and half size boot shell.
4) Make sure your boots fit, and fit well. Strap in and jump around. Check for pressure points and heel lift.
Accessories
[From The Burton LTR Site]
Accessories
Along with your milk money and some music to get you through those lift rides or long hikes, you've got just a few more key items to check off your snowboard necessities list.
Hats / Beanies
Heat rises, right? Don't forget to cover up. Leave the corny faux dreads and jester hats for skiers and snowlerbladers. Look for a functional knit hat or beanie with an acrylic lining (they won't get itchy) and a fit that will stay on at speed. We even have some that include padding to give your noggin a little protection.
Goggles
Protect your eyes from cold, wind, snow and ice, and come back from the mountain with a goggle tan to die for. You'll need 100% UV protection in a non-fogging, wide view goggle. We care so much about goggles that we created anon, addressing the need for technical eye protection in a stylish, snowboard-specific design. When you are shopping for goggles, you'll notice that there are a lot of lens tints. (Hell, anon has 13 to choose from.) Different lens tints perform better in different light conditions, but all you need is Amber, the all-purpose tint, to get you going. Check out anonoptics.com for the full offering.
Protection
Helmet: When you start riding you're going to fall, so many riders prefer the protection of a helmet to a knit hat. Look for a light and solid shell with total visibility and zero restriction, and, this is very important, a multi-impact shell with a real liner. Open-cell foam might be good for grandpa's slippers, but not for protecting your gray matter. Just as with boots, fit is king with helmets, meaning no gaps, looseness or growing room. Try helmets on with your goggles to be sure there are no gaps around the goggle frame for penetration by wind and snow. Shameless plug alert: Check out our R.E.D.® Helmets for the ultimate in snowboard-specific noggin protection. We even make one with built-in headphones, so you can bang your head without worrying about banging your head.
Wrist Guards: You probably won't need them forever, but wrist support is a good thing to get you through the learning stage. You can always borrow them from a friend, but we won't mind if you buy your own high-quality R.E.D. Protection wrist guards from us. Roll on over to redprotection.com to check out the most complete line of snowboard-specific protection you will ever need.
Accessories Recap
1) Are your feet cold? Put on a hat. Knit hats or beanies will keep you warm and out on the hill longer.
2) Goggles are a must. Save the stylish sunglasses for kicking it on the beach.
3) Consider a helmet. It will boost your confidence. Your brother's skate helmet just won't cut it. Snowboard helmets should have a multi-impact shell with a firm foam liner.
What Do I Wear?
You're about to start spending entire days on a mountain in the middle of winter, working hard at having fun. Yes, you'll need the right clothing to keep you riding (while all the chumps in the lodge huddle around the bathroom hand dryer).
Hints
1) Fabric is everything. Shop for waterproof and breathable materials that keep the outside elements out while letting you decide where and when you want to dump the excess heat and moisture created by ripping hard.
2) Get a good pair of gloves and pants. As a beginner, you're going to be spending time on the snow and pushing off of it to stand back up (it's not like you have poles to cheat with).
3) Look for mobility and minimal bulk. Feel like the Stay-Puft Marshmallow man? That's no good. You'll need range of motion to jump up and down and spin around, not to mention the ability to bend over and strap into your bindings without splitting a seam..
Dial your bindings
This is how to customize your bindings to fit your setup. Why settle for preferred stance or general settings for your new hundred dollar plus bindings. Some stuff is dial out of the box... Get those things dialed, or at least know how each setting helps you ride better. The best thing about snowboards is that you can experiment with any stance you want. If you don't like it, change it. That is why rule number 1 is have a screw driver handy at all times. A Burton bullet tool is my favorite, I usually stash one some where at the base of the mountain (don't rely on the mountain to provide tools). Rule Number 2 is use the correct driver for the job, Mounting screws are a size #3 a Driver, Straps are usually a #2. If you strip your inserts that all folks, no warrantys on stuff you break by your own stupidity) Setting up your gear correctly will take about an hour, but will make you ride better for the rest of your life.
Adjusting Your Stance:
• Width
Stance width is the distance from the center of each binding (disc). Widths change each year depending on what fad is "in" this minute. Right now wider stances are "in", but they are narrowing a little from last year. I find that the best stance width is equal to your shoulder width. A narrower stance will be too thin and tippy, a too wide stance will restrict movement. (try this just standing on the ground). I've ridden a 18.5 stance all the way out to a 24inch stance. But now that I'm older and wiser I stick to a 22.5. If you have gas pedals adjust them to fit your boot size BEFORE you put your bindings on your board.
• SetBack
Now that you've found your width, you need to figure out where your bindings will go on the board. Setback is where the bindings fit toward the nose or tail. Centered bindings are in the center of the sidecut of the snowboard. Twin snowboards are symmetrical from the waist out to the tips. If you ride a twin you will probably set it up centered. Most directional snowboards are setback toward the tail .5 inches. this gives lift in powder and helps push through turns.
• Angles
Stance angles are very personal, a small change will make or break your game. If you have a board and are just changing bindings write down your specs, all boards feel different but changing too many variables could be harder to find the sweet spot. If your are setting up your first whip....here are some things to think about. Do you skate or surf? What style riding are you looking to do? A freestyle rider will each bindings in opposite directions (duck foot), having positive angles on the front foot and negative angles on the rear usually about 15º front, 12º back. This setup lets the rider ride forwards and backwards and the feel the same. Almost all snowboards will setup their stance duckfoot, it just feels more comfortable. The riders that want to have more power and control into an turn will setup their bindings both with positive angles (both toes pointing to the nose). A good freeride angle is 21º front, and 15º back. You can ride either stance in any conditions, and still destroy it.
• Lateral Adjustments
Lateral adjustments are the toe to heel placement of your bindings over the snowboard. This one is kinda tricky, your goal is to center your foot across the snowboard. Too much toe or heel overhang and you will with them when you carve, this is called toe-drag or heel-drag. More importantly if your boot isn't centered over your edge, you will have less control and less pressure while carving. Start by putting your boots inside your bindings, and placing the binding one at a time correctly on your board (without screws). gently move them across the board, and make sure the toe and heel have the same amount hanging over the edges. Now without moving your bindings take your boots out and see what holes your inserts line up with. Now screw each one in by hand, and check it by standing in them on a carpet. If it feels comfortable, grab a #3 driver and tighten them up. when the screw are snug STOP. Tightening too much will strip them or make your base pucker.
• Toe Strap
Toe straps have changed a little over the past five years, now almost all bindings come fitted with CAP straps. Caps cover the toe of the boot and pull the boot toward the heel of the binding. They offer more comfort by releasing pressure on the tops of you toes. Older (post 2003) straps would fit across the base of your toes, putting the pressure on the ball of your foot. Most bindings have sliders where the binding meets the strap. straps in the further position will make the control come from the tips of your toes, while the closer setting will put the point of control closer to the ball of your foot. If you have small you will have to use the close setting, and bigger you will have to use the further setting.
On the actual strap there is a screw that lets you adjust it to fit your boot. The correct position is having the padded part centered over the toes. Put your boots inside the bindings. Unscrew the screw on the strap. Keep the plastic inside the strap and contract or extend it to fit your boots. Line it up and screw it in. Both feet will be the same so count the empty holes and do the same to the other foot.
• Ankle Strap
Ankle straps are easy, just like the toe straps they have a few different places that they can attach to the binding. By choosing the higher holes the strap will hold your foot toward the heel and lock it in, the lower places will let you flex your legs better. Yet another control issue, this is where you have to decide for your self and experiment with a bunch of combinations.
The actual strap has a length adjustment too. Some bindings will have more than one length adjustment. Keep the strap attached to the binding and unscrew the screw on the strap. The goal is to get the ankle strap to fit centered over the top of your foot. Find the sweet spot and screw them back together. Give them a test, put your boots on, strap in and inspect them, if it feels good, then move on.
• Forward Lean
Forward lean is my favorite thing to adjust on a snowboard. Forward lean adjustment is highback angle and how much it leans toward the toes. When the highback is at 0º it is straight up, at zero it will be more comfortable and be better for rail and box sliding. When the angle is turned up the heel edge hold is stronger.
• HighBack Rotation
Highback rotation is the most overlooked adjustment on your bindings. The highback should be parallel with the edge. Start by unscrewing the highback where it hinges on the baseplate. Look directly straight down over the binding and twist the highback so it is parallel with the edge. Make sure the highback is pulled back into the binding. Tighten each screw and you are good to go.
Now that you've spent the time, go enjoy riding. The best place to dial in a new setup is a small inexpensive hill where you can take short runs and make adjustments after each run. Remember to take a screwdriver. Once you get the right setup you should be good to go.
Tuning: waxing at home
Taking care of your own gear is the next step of becoming a real snowboarder. You should be waxing your board every 5 times you ride, most of the winter every 3 times. Icy hardpack will take all your wax off before the end of the day, powder will give you a bit more time before you need to re apply. You can tell when to wax when you the area close to the edges starts getting dry. In this video we show how to lay down a sweet wax job with the help of Eric From Ass Wax.
Tools To Get The Job Done:
• Wax - about $9-12 (7 Jobs)
• Iron - Thrift Store $4 - Snowsport Iron $35
• Scraper - $5-10
• Nylon Flat Brush $12
• Buffing Pad $2
As always Eastern Boarder Can bust out a 24hour wax and grind for $25, and save you the time and mess. Just drop it off and pick it up before the weekend.
Tune or de-tune
Tuning your snowboard correctly makes a terrible-day good. Or a good-day terrible. You might be reading this wondering if I really wrote De-Tune. Yes, De-Tuning is when you intentionally dull the edges so oyo can slide rails easier. (DO NOT do this if you are just starting out riding.)
SHARPENING EDGES will make your board hold and edge even on the hardest icy conditions. The most basic sharpening is done by running a file along the edge at a 90º angle, and again at a 0º angle. Experimenting with other angles is called beveling, this allows the board to be a tiny bit looser on the snow but not sacrifice control. Most people run beveled edges on their skis and snowboards. In fact most Boards come with beveled edges